Cold Plunge Installation Requirements Home: 2025 Guide
June 25, 2026 · 13 min read
TL;DR — The Bottom Line
Meeting cold plunge installation requirements home setups demand starts with four pillars: a dedicated GFCI-protected electrical circuit (typically 15A/120V), a level load-bearing surface that supports 800–1,000+ lbs, waterproof flooring with drain access, and adequate ventilation. Plug-and-play bathtub-conversion systems like HomePlunge dramatically reduce installation friction, eliminating plumbing changes and dedicated floor space.
Understanding the full scope of cold plunge installation requirements home owners must address is the difference between a safe, low-maintenance wellness investment and a costly headache. Whether you're eyeing a premium standalone tub or a space-saving bathtub conversion, the electrical, structural, and drainage standards are non-negotiable. This guide breaks down every cold plunge installation requirements home checklist item — from amperage and GFCI protection to floor loads and ventilation — so you can plan confidently before your unit arrives.
Quick Facts
- Typical Circuit: Dedicated 15A/120V GFCI (some units 20–30A/240V)
- Water Weight: 1 gallon = 8.34 lbs; 100-gallon plunge ≈ 834 lbs filled
- Minimum Clearance: 16" equipment side, 12" drain side
- Outlet Distance: ≥ 5 ft (1.5 m) from water per common manufacturer guidance
- Surface Requirement: Level, solid, waterproof, non-flexing
- HomePlunge Advantage: Zero plumbing, no dedicated floor space, sets up in seconds
Why Cold Plunge Installation Requirements Home Planning Matters
Modern residential cold plunges are no longer simple tubs of ice water. They integrate chillers, circulation pumps, UV sanitation, ozone systems, smart controls, and filtration — making them closer in complexity to a compact spa than a bathtub. That sophistication means the cold plunge installation requirements home owners face today involve serious electrical loads, structural considerations, and waterproofing planning.
Skipping any one of these requirements can void warranties, trip breakers, damage flooring, or worse — create a shock hazard. The good news: with a clear checklist and the right product choice, most homeowners can meet every requirement without a full renovation.
The cold plunge market has expanded rapidly, with brands like Plunge, Ice Barrel, Renu Therapy, and HomePlunge offering vastly different installation profiles. Premium standalone units may require a dedicated 240V circuit and concrete pad; bathtub-conversion systems can plug into a standard GFCI outlet with no plumbing changes. Knowing what your specific setup demands is step one.
Electrical Requirements: The #1 Cold Plunge Installation Priority
Electricity and water demand respect. Of all the cold plunge installation requirements home buyers must address, electrical compliance is the most regulated — and the most dangerous to get wrong.
Dedicated Circuit and Amperage
Most residential cold plunge systems require a dedicated circuit, meaning no other appliances share that breaker. Typical specs include:
- Entry-level / plug-and-play: 15A, 120V dedicated GFCI circuit
- Mid-range chillers: 20A, 120V circuit
- Premium / high-output: 30A, 240V circuit with 10-gauge wiring
Sharing a circuit with a microwave, hairdryer, or laundry appliance is the fastest way to repeatedly trip your breaker and shorten your chiller's compressor life.
GFCI Protection Is Mandatory
A Ground Fault Circuit Interrupter (GFCI) detects current leakage and cuts power within milliseconds — essential anywhere water meets electricity. The National Electrical Code (NEC) requires GFCI protection on all outlets within 6 feet of a water source. Some plunge units include a GFCI on the cord plug, but local code often still mandates a GFCI outlet or breaker as well, especially outdoors or in bathrooms.
Only if that outlet is a true dedicated GFCI circuit rated for the unit's amperage draw. Most bathroom outlets share circuits with lights or vanity outlets, which will cause repeated trips. A licensed electrician should confirm or install a dedicated line.
Outlet Location, Clearance, and Outdoor Hardware
Manufacturer guidelines commonly require outlets be placed at least 5 feet (1.5 m) from the plunge water line. Outdoor installations must use weather-resistant (WR) GFCI outlets with in-use bubble covers. For permanent outdoor installs, bonding and grounding to local pool/spa electrical code is typically required.
Structural and Floor Load Requirements
Water is heavy, and cold plunges hold a lot of it. A standard 80–120 gallon plunge weighs 800–1,000 lbs filled, and once you add a 200-lb user, you're easily exceeding 1,200 lbs concentrated in a small footprint.
Indoor Floor Considerations
Concrete slab-on-grade floors (basements, ground-floor garages) handle plunge loads without issue. Wood-frame floors — especially upper-level rooms in older homes — may need structural review. A typical residential floor is engineered for 40 lbs per square foot live load; a filled plunge can exceed that locally. Have a contractor or structural engineer evaluate joist spans, sister joists if needed, and consider load-spreading platforms.
Outdoor Pad Requirements
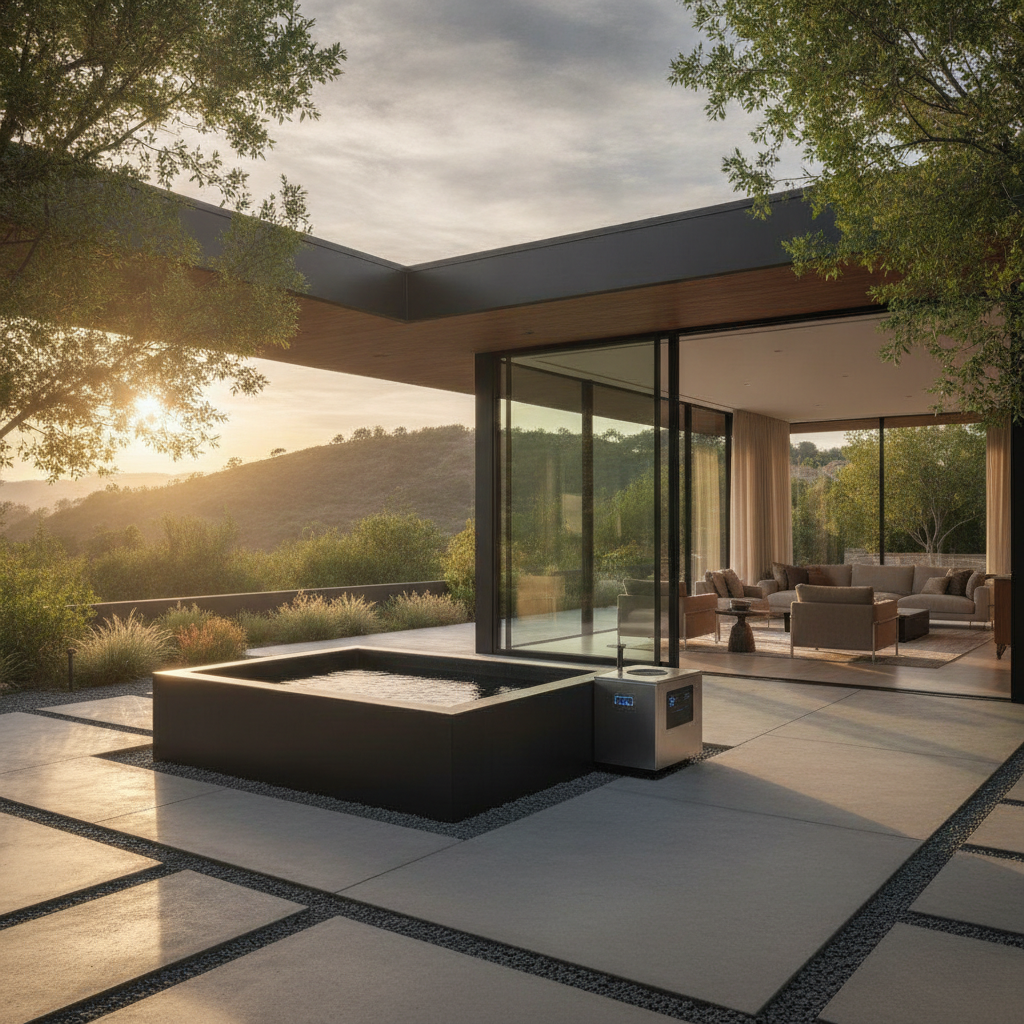
Outdoor units demand a level, solid, non-flexing surface: a 4-inch reinforced concrete pad, properly bedded pavers on compacted gravel, or a deck rated for hot-tub-level loads (typically 100+ psf). Never place a plunge directly on lawn, dirt, or gravel — settling will misalign drain plumbing and cause leaks.
The Bathtub-Conversion Workaround
One of the clearest advantages of conversion-style systems like HomePlunge's bathtub plunge is that your existing tub is already engineered and supported for water loads. No new structural assessment, no pad pour, no joist reinforcement. This eliminates one of the most expensive line items in traditional cold plunge installation requirements home checklists.
Plumbing, Drainage, and Waterproofing Essentials
Even self-contained cold plunges need a plan for filling, draining, and managing the inevitable splashes. This is where many DIY setups fail.
Fill and Drain Access
Most plunges fill from a standard garden hose — meaning you need a hose bib or sink within reasonable reach. Drain valves typically require 12 inches of front or side clearance for hose attachment. Plan the drain hose route to a floor drain, outdoor grade, or shower drain before you place the unit.
Waterproof Flooring
For indoor cold plunge installation requirements home setups, the surrounding floor must be waterproof and slip-resistant. Acceptable surfaces include:
- Sealed concrete
- Porcelain or ceramic tile with sealed grout
- Vinyl plank or sheet vinyl (commercial grade)
- Epoxy-coated garage floors
Avoid carpet, unsealed hardwood, laminate, and engineered wood — all are vulnerable to splash damage and humidity.
Floor Drain or Containment
A floor drain is ideal but rarely present in residential bathrooms or basements. Alternatives include a low curb, a waterproof shower pan liner under the unit, or careful placement near an existing shower drain.
For standalone plug-and-play units, usually no — you fill with a hose and drain to an existing drain. For permanent hard-plumbed installations or custom basements, a licensed plumber should handle supply lines and drain tie-ins. Bathtub-conversion systems require zero plumbing work.
Ventilation, Humidity, and Climate Control
Cold plunges produce condensation. A 50°F water surface in a 70°F room will create constant moisture transfer, and the chiller itself exhausts heat and humidity as it works.
Indoor Ventilation
An indoor plunge room should have either an exhaust fan rated for bathroom or spa use (minimum 80 CFM, ideally 150+ CFM for the room size) or an operable window. Without ventilation, expect condensation on windows, mold risk on drywall, and degraded indoor air quality. Many homeowners pair the plunge room with a small dehumidifier set to 50% RH.
Chiller Heat Exhaust
The chiller is essentially a small air conditioner running in reverse — it removes heat from water and dumps it into the surrounding air. Indoor chillers need at least 12–24 inches of clearance around the heat exhaust grille, and the room should be sized to dissipate that heat. A tightly sealed closet will choke the chiller, reducing cooling capacity and shortening compressor life.
Outdoor Considerations
Outdoor units handle ventilation naturally but face different challenges: freeze protection in winter, UV degradation of covers, and shade requirements for the chiller in hot climates. Most premium outdoor units are rated for 20–110°F ambient operation.
Site Selection: Indoor vs. Outdoor Cold Plunge Setup
Where you place the unit shapes nearly every other cold plunge installation requirements home decision.
Comparison Table
| Factor | Indoor Setup | Outdoor Setup |
|---|---|---|
| Electrical | Standard GFCI; easier wiring runs | WR GFCI, in-use covers, bonding required |
| Structural | Floor load assessment often needed | Concrete pad or rated deck required |
| Drainage | Floor drain ideal; waterproof floor mandatory | Drain to grade; natural runoff |
| Ventilation | Exhaust fan + dehumidifier recommended | Natural ventilation |
| Year-round Use | Comfortable in all weather | May need freeze protection |
| Privacy | Built-in | May need screening |
The Bathtub Conversion Option
The HomePlunge bathtub conversion sidesteps the indoor-vs-outdoor decision entirely by using your existing bathroom. The tub handles structural and waterproofing requirements; the bathroom already has a fan, drain, and GFCI outlet. This is why bathtub-conversion plunges are increasingly attractive to renters, condo owners, and anyone unwilling to commit dedicated floor space.
Step-by-Step: Cold Plunge Installation Requirements Home Checklist
Use this sequence to plan your installation from purchase to first plunge:
- Choose your site. Indoor, outdoor, or bathtub conversion. Measure clearances on all sides per manufacturer specs.
- Verify electrical capacity. Have a licensed electrician confirm your panel has spare capacity and install a dedicated GFCI circuit matching the unit's spec sheet.
- Assess structural load. For indoor non-slab floors, confirm joist capacity. For outdoor, pour or install a level, solid pad.
- Waterproof the surroundings. Install or confirm waterproof flooring within a 4-foot splash radius.
- Plan drainage. Identify the drain hose route to a floor drain, shower, or outdoor grade.
- Address ventilation. Ensure indoor exhaust fan capacity and chiller clearance.
- Position and level. Use shims as needed; verify level in both axes.
- Fill, prime, and test. Fill per manufacturer instructions, prime the pump, run the chiller for 12–24 hours before first use.
Following this sequence prevents the most common cold plunge installation requirements home mistakes — buying the unit first and discovering electrical or structural problems after delivery.
"The best cold plunge installation is the one you never think about again — where electrical, drainage, and structural planning are done right the first time and the unit simply works."
How HomePlunge Simplifies Cold Plunge Installation Requirements Home Setups
The traditional cold plunge installation requirements home checklist assumes you're installing a 100+ gallon standalone unit with its own footprint, electrical run, and pad. HomePlunge's bathtub-conversion approach fundamentally rewrites that checklist:
- No dedicated floor space — uses your existing tub
- No new electrical circuit — runs on a standard bathroom GFCI outlet
- No plumbing changes — fills and drains through your existing tub
- No structural assessment — your bathroom is already rated for tub loads
- No waterproofing project — your bathroom already qualifies
- No tools, no contractors — sets up in seconds
Recognized in TIME's Best Inventions 2025 special mentions, HomePlunge's Bella ($1,849) and H3 ($2,999) models deliver the cold therapy benefits of premium standalone units without the installation burden — a meaningful differentiator in a market where competitors often require thousands in site prep alone.
Common Installation Mistakes to Avoid
Even with a solid checklist, homeowners repeatedly trip on the same issues:
- Sharing a circuit. The plunge trips the breaker every time another appliance starts.
- Skipping the level check. An out-of-level plunge causes uneven water levels, pump cavitation, and drain issues.
- Placing chiller in a sealed closet. Without exhaust airflow, the unit overheats and the compressor fails prematurely.
- Ignoring condensation. Indoor units without ventilation grow mold on adjacent walls within months.
- Using non-GFCI outdoor outlets. A code violation and a serious shock risk.
- Underestimating water weight. Second-floor installs on aging joists are a structural risk.
Frequently Asked Questions
What are the minimum electrical requirements for a home cold plunge?
Most residential cold plunges require a dedicated GFCI-protected circuit. Plug-and-play units typically need 15A/120V; mid-range units need 20A/120V; premium high-output units may require 30A/240V with 10-gauge wiring. A licensed electrician should verify panel capacity and install the circuit to NEC code.
Can I install a cold plunge on my second floor?
Possibly, but only after a structural assessment. A filled plunge with a user can exceed 1,200 lbs concentrated in a small area, which may exceed older wood-frame floor capacities. A structural engineer or contractor should evaluate joist spans, and reinforcement may be needed. Slab-on-grade or basement installs avoid this concern entirely.
Do I need a permit to install a cold plunge at home?
Permits are typically not required for plug-and-play standalone or bathtub-conversion units. However, any new electrical circuit installation usually requires an electrical permit and inspection. Hard-plumbed installations or outdoor structural pads may require additional permits depending on your municipality. Check local codes before installation.
How much does cold plunge installation cost?
Installation costs vary widely. Plug-and-play standalone units with an existing suitable outlet cost $0–$500. Adding a dedicated GFCI circuit typically runs $400–$1,500. Outdoor pads and structural work can add $1,000–$5,000+. Bathtub-conversion systems like HomePlunge advertise zero installation cost since they use existing electrical, plumbing, and structure.
Can a cold plunge be installed in a bathroom?
Yes — bathrooms are often ideal because they already have GFCI outlets, exhaust ventilation, waterproof flooring, and drain access. Bathtub-conversion systems are designed specifically for this scenario and require no modifications. Standalone units in bathrooms still need verification of floor load capacity and adequate clearance around the chiller.
Conclusion: Plan First, Plunge Second
Meeting the full set of cold plunge installation requirements home owners face is straightforward when you plan in the right order: site selection, electrical, structural, drainage, ventilation, then purchase. Skip the planning and you'll spend more on retrofits than you did on the unit itself.
If the prospect of dedicated circuits, structural assessments, and waterproofing projects feels like overkill for a wellness habit, you're not alone. That's exactly why bathtub-conversion systems have become one of the fastest-growing segments of the cold plunge market — they collapse the entire installation requirements checklist into a single step: plug it in.
Ready to skip the installation headache entirely? Explore HomePlunge's bathtub-conversion cold plunges and discover how thousands of homeowners are enjoying daily cold therapy without electricians, contractors, or renovation.